The zone buzzes and never opens, or it opens and will not close until someone turns the bleeder. The valve body under that solenoid may be fine. Most residential valves in a Deer Park yard are pilot-operated: the solenoid does not lift the diaphragm by brute force. It is a small electromagnet that raises a plunger and lets water pressure move the diaphragm. When the coil is open, the plunger is stuck, or the port under it is packed with grit, the valve misbehaves even though the globe of the valve has years left. Replacing that solenoid is a real repair. Replacing the entire valve is sometimes the slower way to discover the coil was the only failed part.
What the solenoid is accountable for
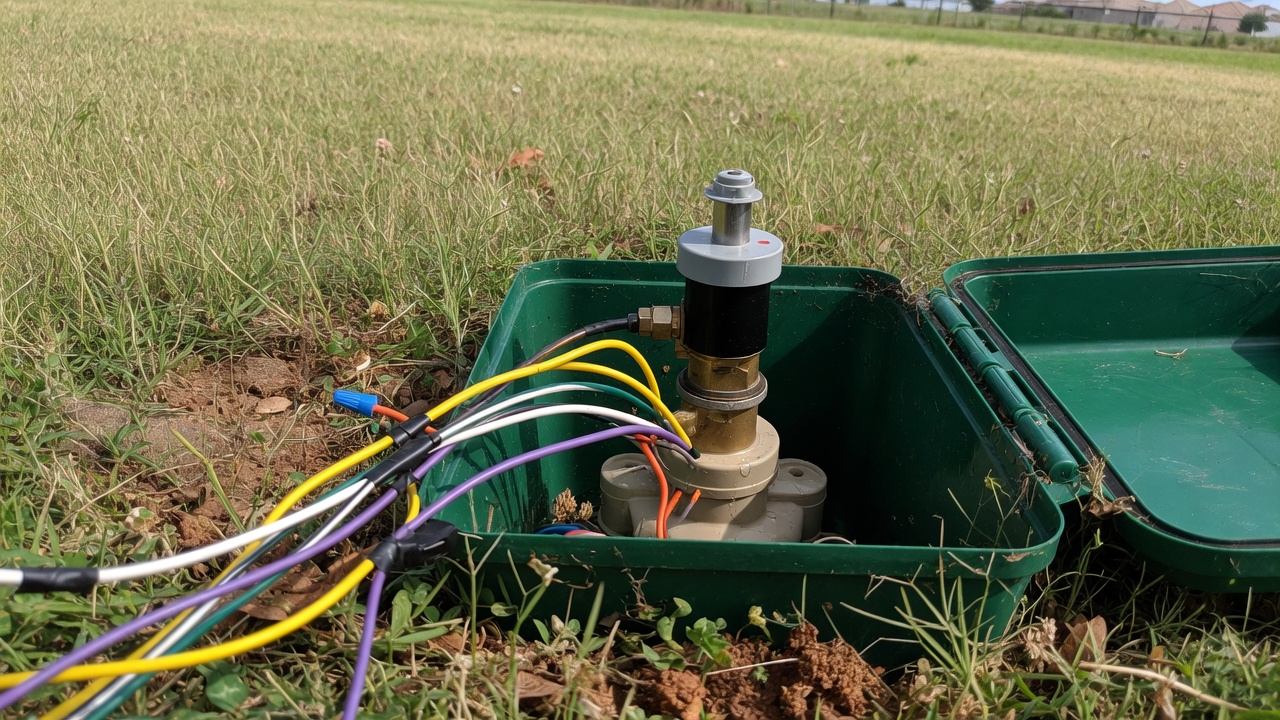
On a conventional system the controller sends about 24 volts AC down the station wire. The coil builds a magnetic field, the plunger lifts, and a tiny port changes how pressure sits on top of the diaphragm. Close the port and pressure holds the diaphragm shut. Open it and the diaphragm lifts and the zone runs. A coil that reads open, or a plunger jammed with sand, never starts that sequence. A plunger that sticks up, or a manual bleed left open, never ends it.
You can hear a healthy solenoid snap when the zone is turned on by hand at the controller. A buzz with no snap, or silence when you already know voltage is present, points at the coil. The electrical side of “no water at all” is sorted in a zone that will not turn on. This article starts after that sort: voltage is at the solenoid, or the solenoid is the part that will not shut the valve, and the pipe and the clock have been ruled out.
A rough resistance check helps when the wires are disconnected and the power is off. Many 24-volt irrigation coils land around 20 to 60 ohms, but use the number for that model. Infinite resistance means an open coil. A near short means the coil is done. A plausible reading with a stuck plunger means the metal parts under the coil are the problem. Do not condemn the valve body from ohms alone.
When a solenoid swap is the whole repair
Swap the solenoid when the valve will not open and the coil is open or shorted, when the plunger is seized and a new plunger-and-spring is not available for that model, or when the coil was cooked by a station that stuck on for days. Match the valve brand and the thread. Hunter, Rain Bird, Irritrol, and the other common bodies do not all take the same solenoid. A coil that “almost” threads will cross-thread the port or leave a leak path that mimics a bad diaphragm.
Turn the water off, or use the flow control if you understand how that model behaves under pressure, before you unscrew the solenoid. The plunger and spring live inside it. Tip them into your hand, not into the valve box. Clean the port you are about to reuse. A grain of grit left in the bleed seat will make the new coil look defective. Seat the O-ring or gasket that belongs under the solenoid. Thread it by hand until it is home, then snug it. Cranking it with pliers is how the plastic port splits, and then you really do need a new valve.
Re-splice with connectors made to live in a wet box. A dry household wire nut will recreate the failure at the copper instead of the coil. Conventional AC solenoids are not polarity sensitive. Either wire can land on the station or the common. Latching DC solenoids used with two-wire decoders are polarity sensitive, and they are not interchangeable with a 24-volt AC coil. If the system is two-wire, stop and match the decoder parts. Guessing burns the new coil.
When the valve body still has to come out
A solenoid cannot fix a diaphragm that is torn, a seat full of gravel, or a bonnet cracked by a hard freeze. If the valve will not shut after a known-good coil is installed, and the manual bleeder behaves the same way, the diaphragm and the seat are next. That is still valve repair, and on many models it is a diaphragm kit rather than a whole new globe. If the body is split, the threads are stripped, or the valve is a brand with no parts left in circulation, replacement is the honest end of the visit.
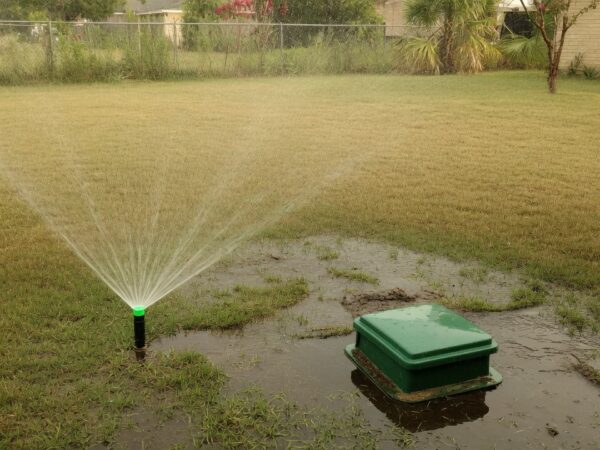
Do not keep installing coils on a valve that weeps from the bonnet screws or from a crack under the solenoid collar. The new part will be wet, the splice will corrode, and the zone will be back on the list in a month. Also do not ignore the box. A coil can survive being underwater better than the connector can. If the valve box was full when you opened it, the reason belongs in why that valve box is full of water. Putting a dry coil back into a sump is a short repair.
Deer Park site conditions inside the valve box
Clay yards hold water in a box that was set a little low. After a spring rain the splices sit submerged, the copper greens, and the coil runs hot on a poor connection until it opens. The valve itself may still shut by hand. That combination, electrical failure with a healthy diaphragm, is the best case for a solenoid and a proper connector rather than a new manifold.
Older boxes along East Boulevard and near Center Street are often too small for the number of valves that eventually landed in them. Solenoids get shouldered against the lid, the wires are pulled tight, and a mower over the lid cracks a coil. When you replace one, give the wires slack and do not pinch them under the cover. Newer manifolds in Parkwood and Spencerview have more room and a different fault: construction sand in the port under the plunger, left from the day the system was charged. Cleaning that port matters as much as the new coil.
Along Spencer Highway, commercial valves may be larger and the solenoid may not be a big-box residential part. Forcing a homeowner coil onto a one-and-a-half-inch valve because the threads looked familiar is how a parking-lot zone stays off through a weekend. Match the model. The same rule applies after a freeze. A hard cold snap that split two bonnets on a manifold is not a coil problem, even if one solenoid also died. Look at every valve that shared that freeze before you close the box.
Checklist for replacing the solenoid only
- Confirm voltage at the valve, or confirm the zone will not shut, so you are not treating a cut wire as a bad coil.
- Identify the valve brand and buy the solenoid that actually threads into it.
- Shut the water or control the zone so the port is not under full pressure when it opens.
- Catch the plunger and spring. Note which way they sit.
- Clean the bleed port and replace the gasket or O-ring.
- Hand-thread the new solenoid. Do not cross-thread it onto a wet plastic port.
- Splice with waterproof connectors and leave slack under the lid.
- Restore pressure, run the zone, and watch it open and close. A buzz is not a pass.
- If it will not shut with the new coil, stop and inspect the diaphragm and seat.
- If the box is wet, find out why before you call the repair finished.
Leave the valve when the valve is innocent
A solenoid is a small part with a specific job. Replacing the whole valve every time a zone buzzes turns a half-hour repair into a cut pipe, a pair of unions, and a box that no longer closes. There are days the body has to go. They are the days the diaphragm, the seat, or the shell has failed, not the days the coil measured open.
If you are staring at a buzzing valve and you would rather not learn the thread sizes in a muddy box, call Deer Park Sprinkler Repair at (281) 764-7088. We replace solenoids when that is the failed part and we move on to sprinkler repair at the diaphragm or the pipe only when the coil was never the problem.